
Alpha Release. The current SKOPE application is an alpha release, meaning that while we believe the results to be accurate, the application has not been thoroughly tested and is subject to frequent change. To run the application in another window, click here. The SKOPE team is constantly adding features so all details of the application’s operations may not be reflected in this documentation. We have a substantial backlog of features slated for development. At this point we would be particularly grateful for bug reports and reports that data does not seem to be displayed or graphed correctly. Please send comments and queries to Keith Kintigh.
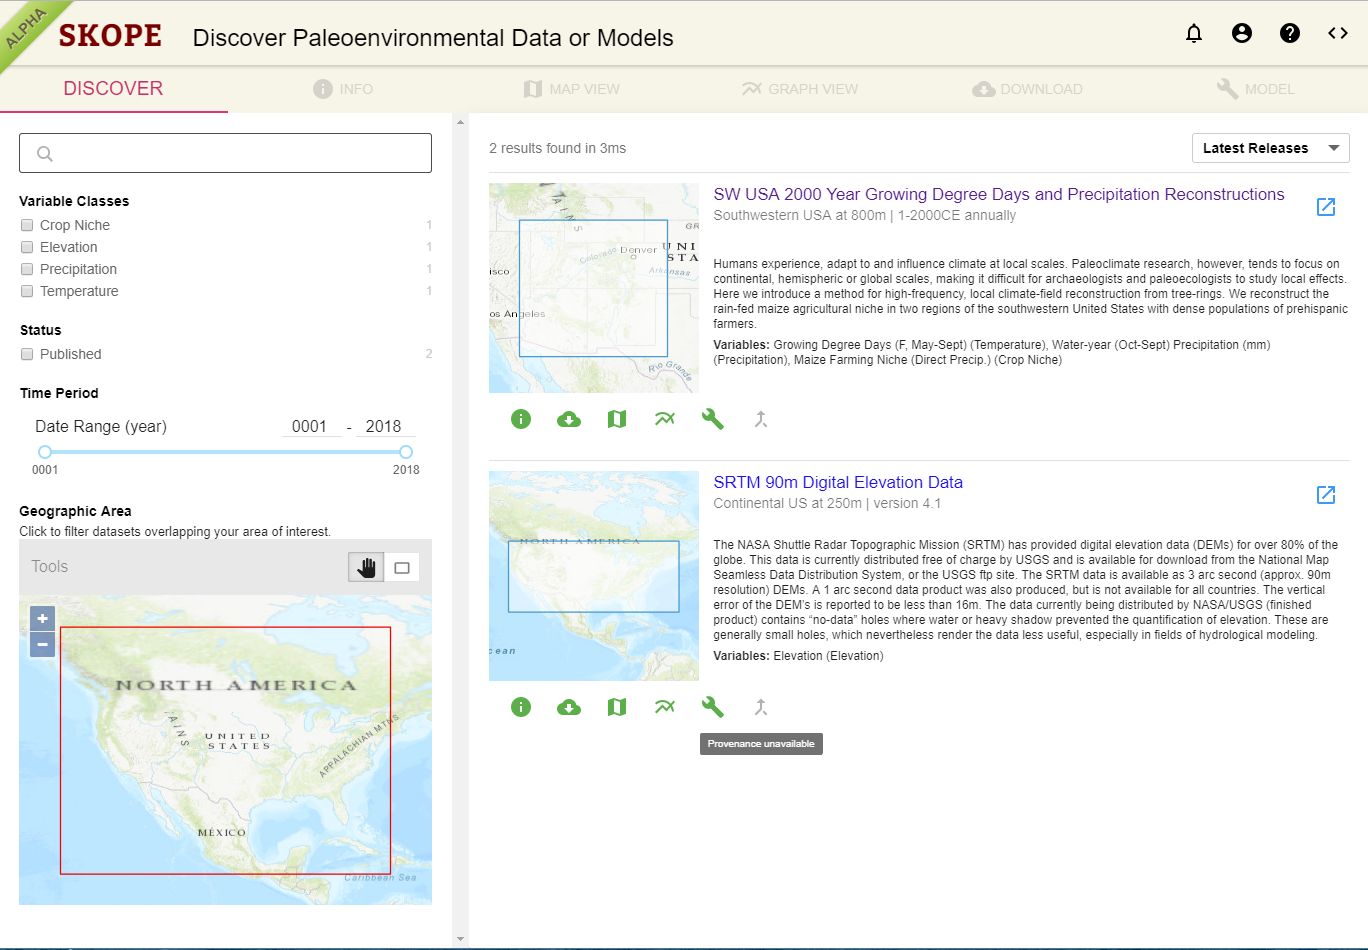
Discover. The SKOPE application starts on the Discover tab, from which you select the paleoenvironmental dataset you wish to explore. You can do that either by paging through the descriptions on the right pane, or by filtering the available datasets (using the left pane) by the class of variable that is of interest (e.g. precipitation), the time period of interest, whether the dataset is published, or the geographic area of interest. When filters have been selected, only those datasets matching (i.e. overlapping) your conditions will be shown.
To select a dataset simply click on its title. If this is your first view of the dataset, you will be taken to its Info page.
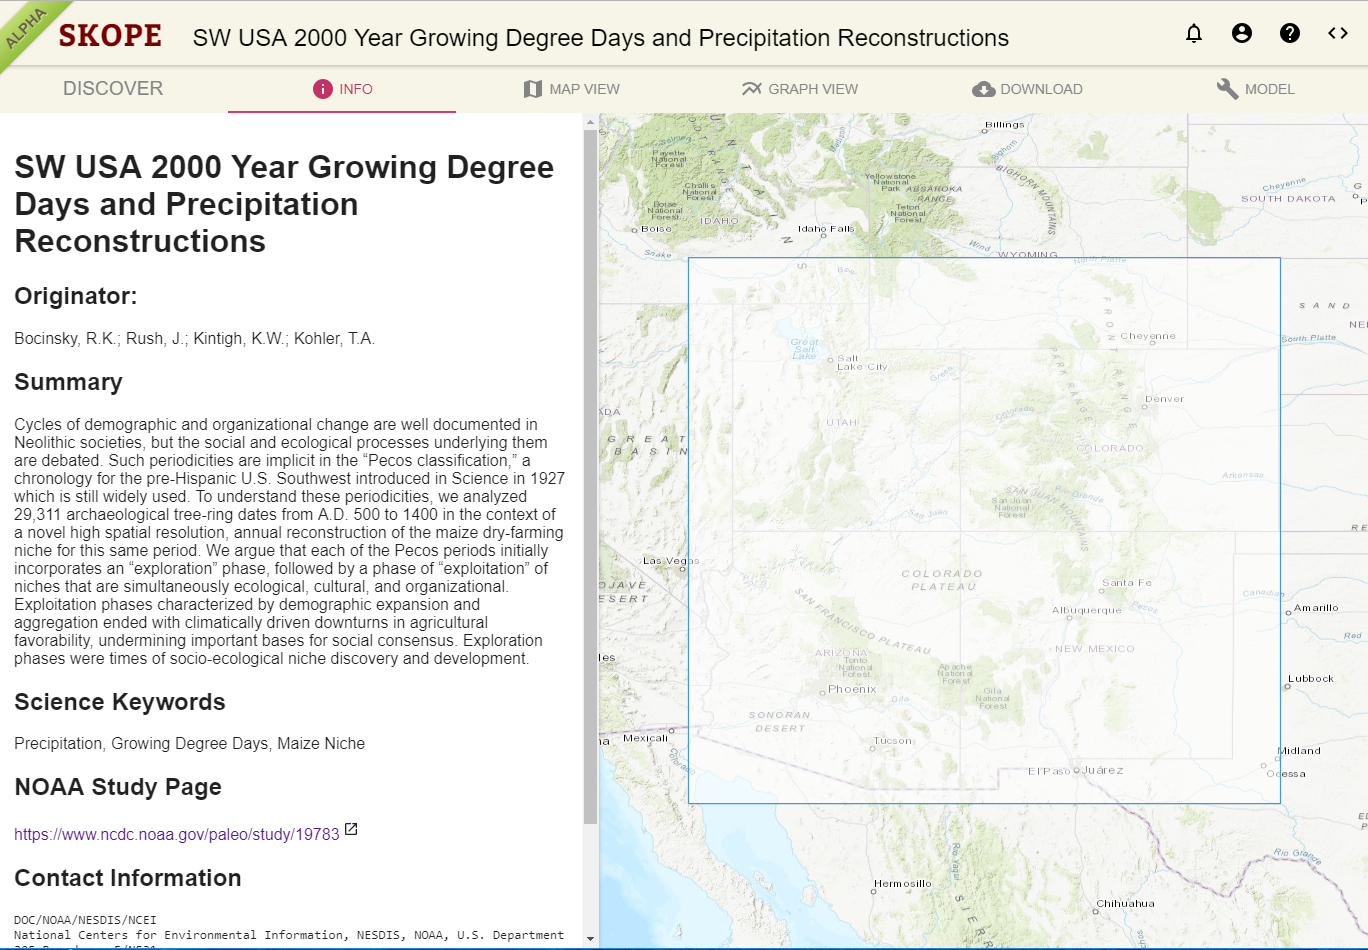
Info. The info tab provides metadata on the selected dataset. This includes the title and author, a brief summary (including spatial and temporal resolution), keywords, and additional information.
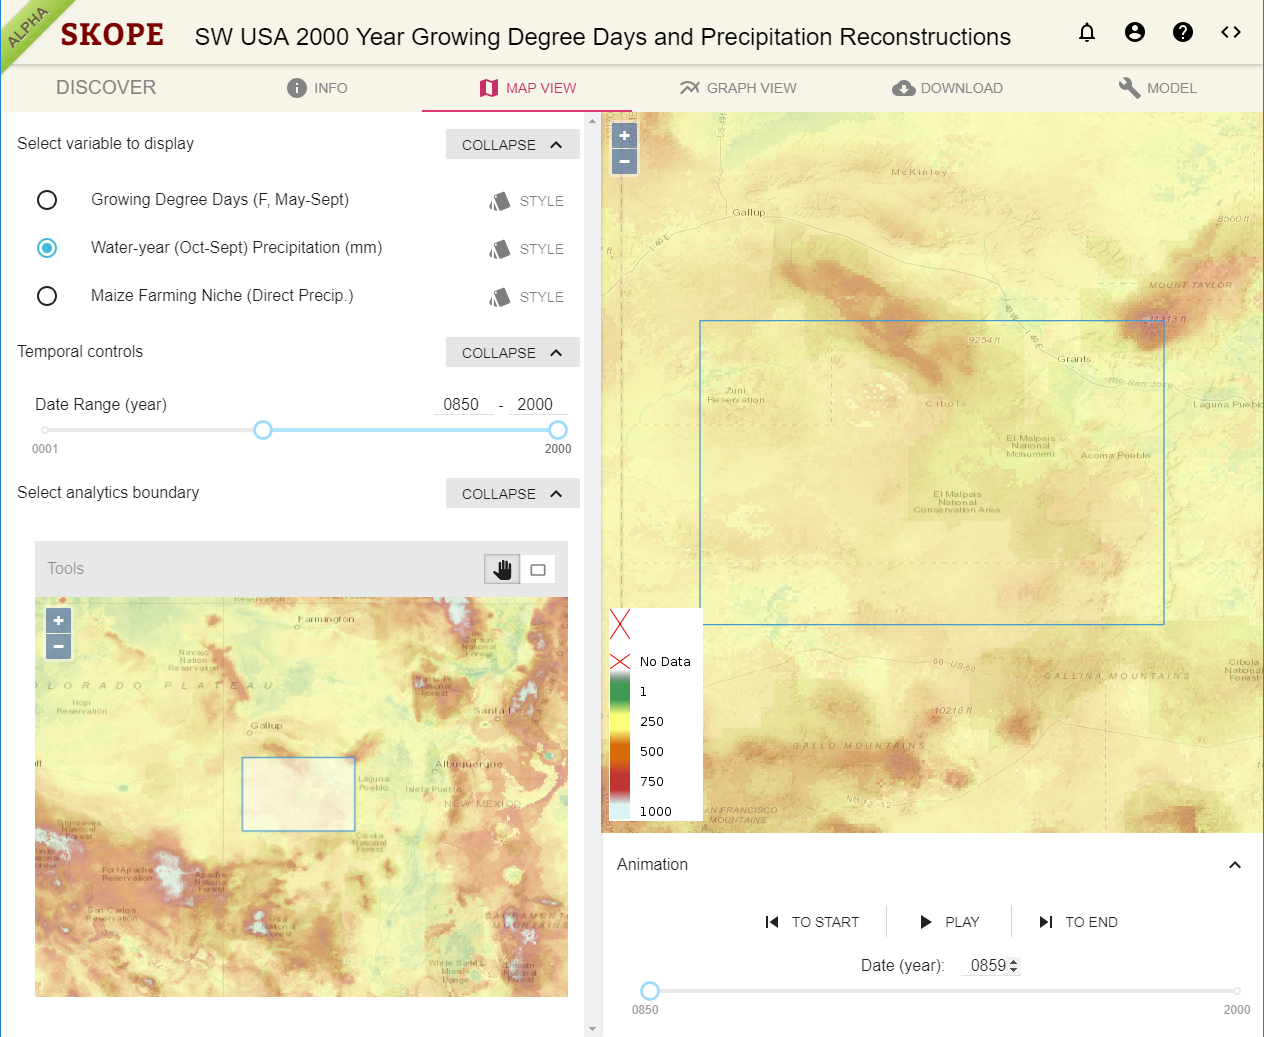
Variable, Temporal, and Spatial Selection (Map and Graph View). In the map and graph view, selection of the variable, time period, and geographic area is done on the left pane. The specific variables available in the selected dataset (as selected on the Discover tab and as displayed in the title line at the top of the window, ) are listed at the top of the left pane. A variable’s display properties (e.g. opacity) can be modified by clicking the Style icon to the right of the variable name (or hidden by again clicking on the style icon). Current display properties include only Opacity. Overlay Range, truncating the range of values displayed with different colors, will be implemented soon. When overlay range is implemented, the values to be displayed are narrowed using the left and right sliders or may be typed in. Values less than the selected lower range limit will display the color of that lower limit, and similarly for values above the upper range limit.
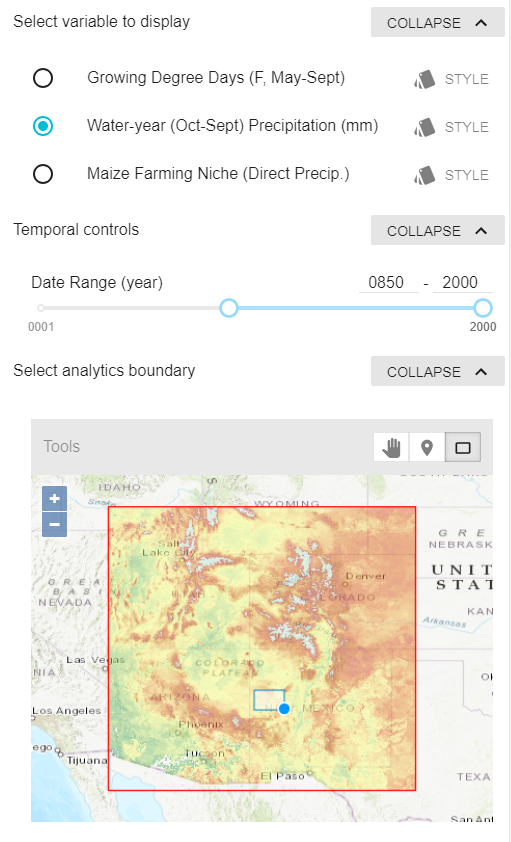
The temporal control defaults to the full temporal range available in the dataset. This may be narrowed by typing over the “from” and “to” dates displayed to the right, by moving the left and right (lower and upper bound) sliders, or having clicked on one of the text dates, by incrementing or decrementing the value with the arrows that appear. Datasests with annual resolution display the year. Datasets (e.g. PRISM) with monthoy resolution will appear as YYYYMM.
The spatial selection is done by zooming using the + and – , and panning (with the Hand icon selected [outlined gray]) on the map at the bottom of the left pane to the general area of interest. The red outlined area in that map indicates the area for which the selected dataset has data. Having zoomed and panned to the general area, a particular geographic selection may be defined using the point selection icon or the rectangle selection icon and clicking and dragging to define a rectangle (circle and polygon selection forthcoming).
Map View. The map view shows a map that is colored based on the value of the selected variable, for the selected area, for the first temporal interval (e.g., year) of the selected temporal range. The selected area is outlined in blue. In the legend, the X indicates transparent color. In most cases (e.g., precipitation), the variable values are in a time series (i.e. a differ value for each year) and the map visualization can be shown for any time step (e.g. year) or run as an animation using the controls under the large map on the right, using the temporal range selected. Or, you can jump to a specific year by typing over the year displayed below the big map on the right and pressing Enter or Tab. Spatial, temporal and variable selections can be made at any time in the left pane.
Note. The map view legend reflects the overlay color (indicating the selected variables value) assuming that the variable’s overlay opacity is set to 100% and neglecting the effect of the base map. To effectively compare the displayed overlay colors on the map, you may need to increase the variable’s opacity. To do that click on [Style] (to be replaced by a gear) and move the opacity slider to the right.
Graph View. The Graph View provides analytics for a selected variable, time range, and a point or defined geographic area. Using the selections displayed on the left, the Graph view will plot the value of the selected variable for the selected temporal interval. If a point is selected, the graph view plots the value for the point. If a rectangle (or, later, other) area is selected, then the plot represents the average (mean) of the spatial cells within or overlapping the boundary. An uncertainty interval for the graph map be turned on or off. (Other ways of aggregating data for the selected area, and graph smoothing are under development.)
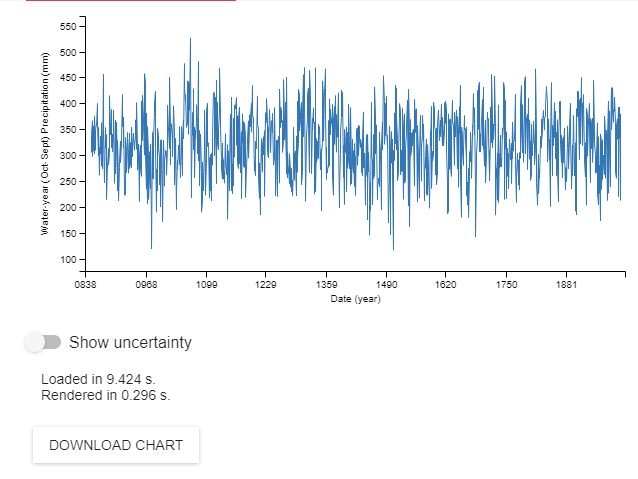
Because graph generation is a computation-intensive procedure, it may take some time for the graph to be generated. The needed time will increase with the size of the geographic selection and the length of the temporal selection. If too large an area is selected, the server will time out. In that case a smaller area should be selected (options allowing longer computations will be added). No graph will be displayed before a variable and point or area have been selected. (Future versions will permit user-specified timouts.)
Tsde Download Chart button will download both the chart itself (in SVG format [other formats to come]) and the data underlying the graph in CSV format.
If the dataset does not represent a time series, the Graph View is grayed out and unavailable.
Download. The download tab is under development but will allow the download (when permissible) of the geospatial source data for a variable, temporal, and geographic selection.
Model. The Model tab is under development. When it is implement and when the model source code is available for the selected dataset, the model tab will allow “tinkering,” rerunning the model with different parameters.
Help & Comments. Please send comments and queries to Keith Kintigh.